Java教程
『互联网架构』软件架构-Spring boot集成三方中间件

继续说集成三方中间件的,主要说说统一异常处理,集成Mybatis,集成redis,集成RabbitMQ。

(一)统一异常处理
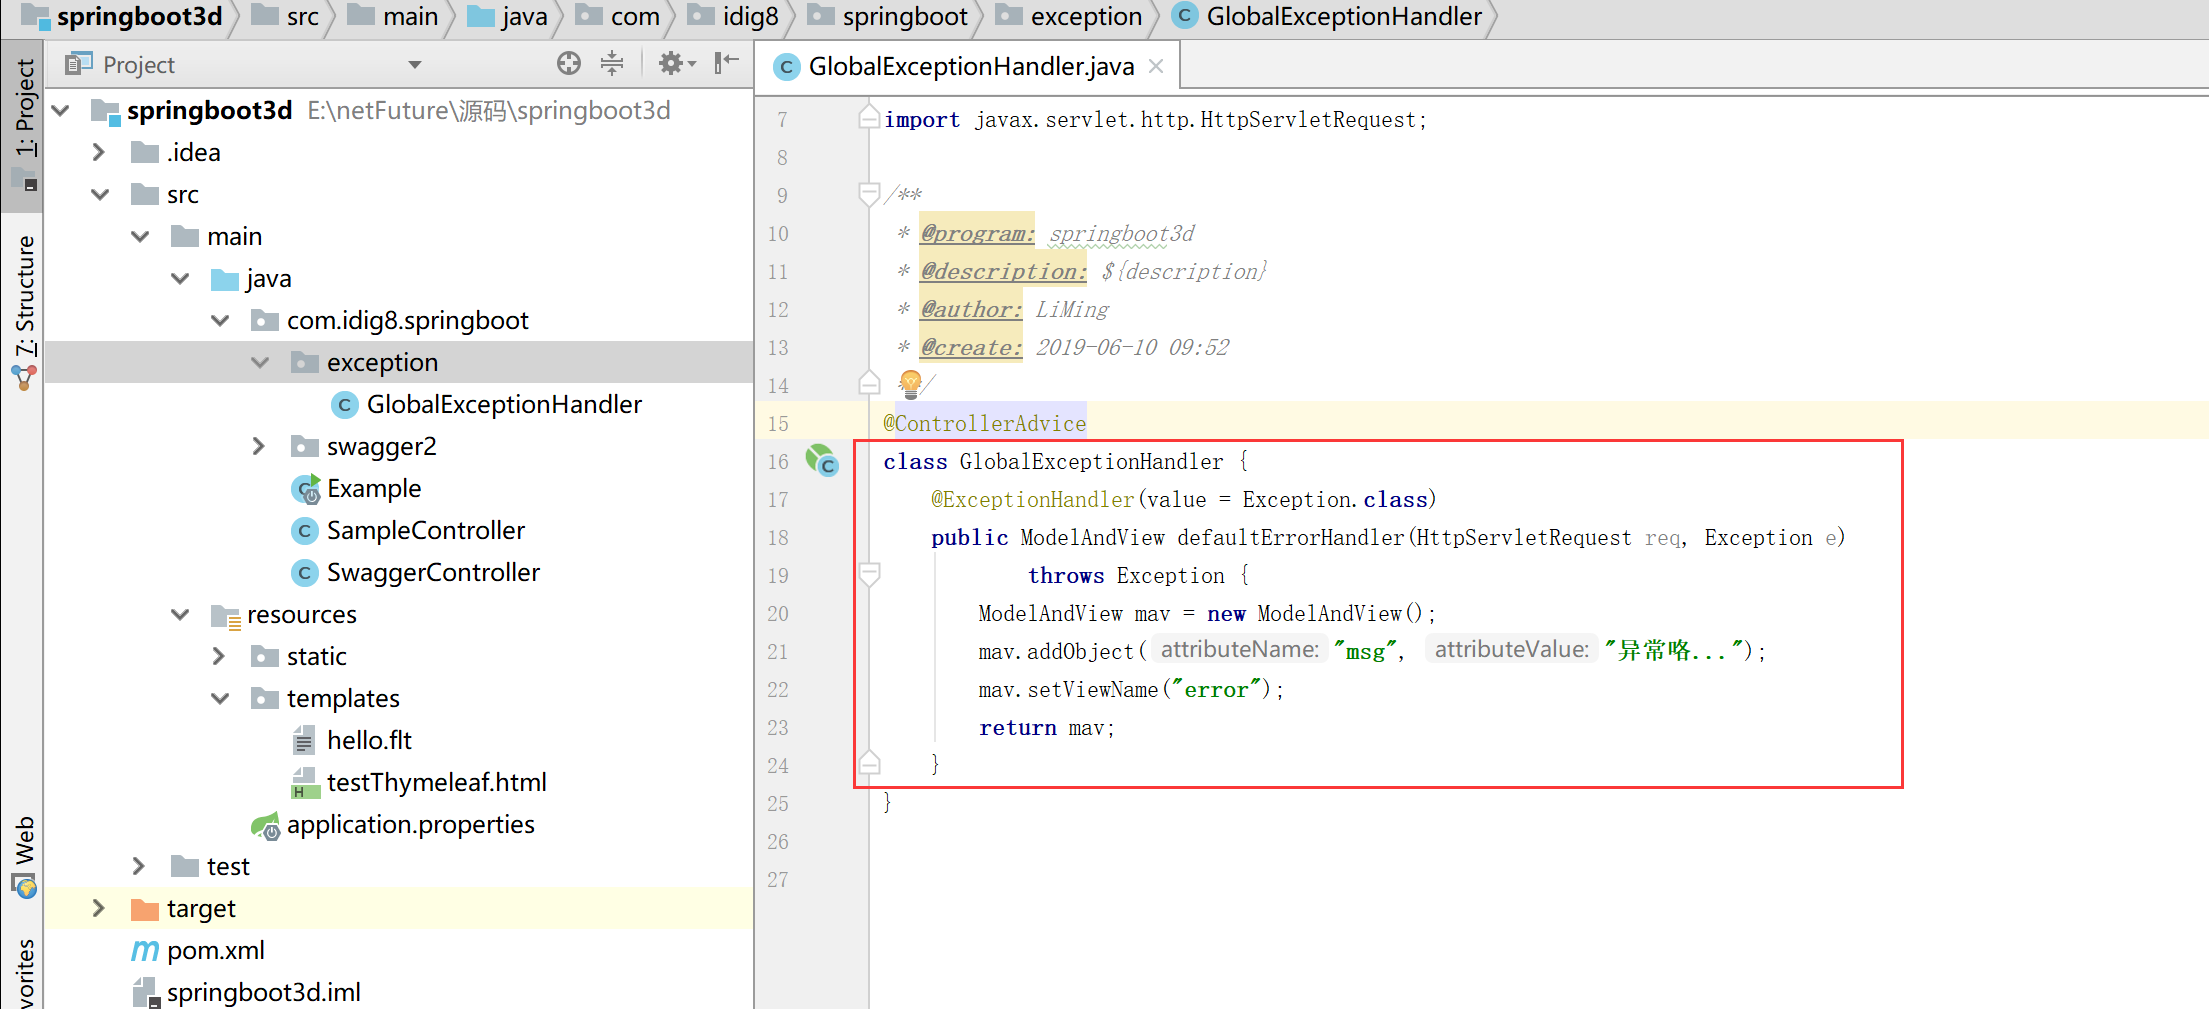
创建全局异常处理类:通过使用@ControllerAdvice定义统一的异常处理类,@ExceptionHandler用来定义针对的异常类型。
1.创建统一异常Controller
@ControllerAdvice

class GlobalExceptionHandler {

@ExceptionHandler(value = Exception.class)

public ModelAndView defaultErrorHandler(HttpServletRequest req, Exception e)

throws Exception {

ModelAndView mav = new ModelAndView();

mav.addObject("msg", "异常咯...");

mav.setViewName("error");

return mav;

}

}
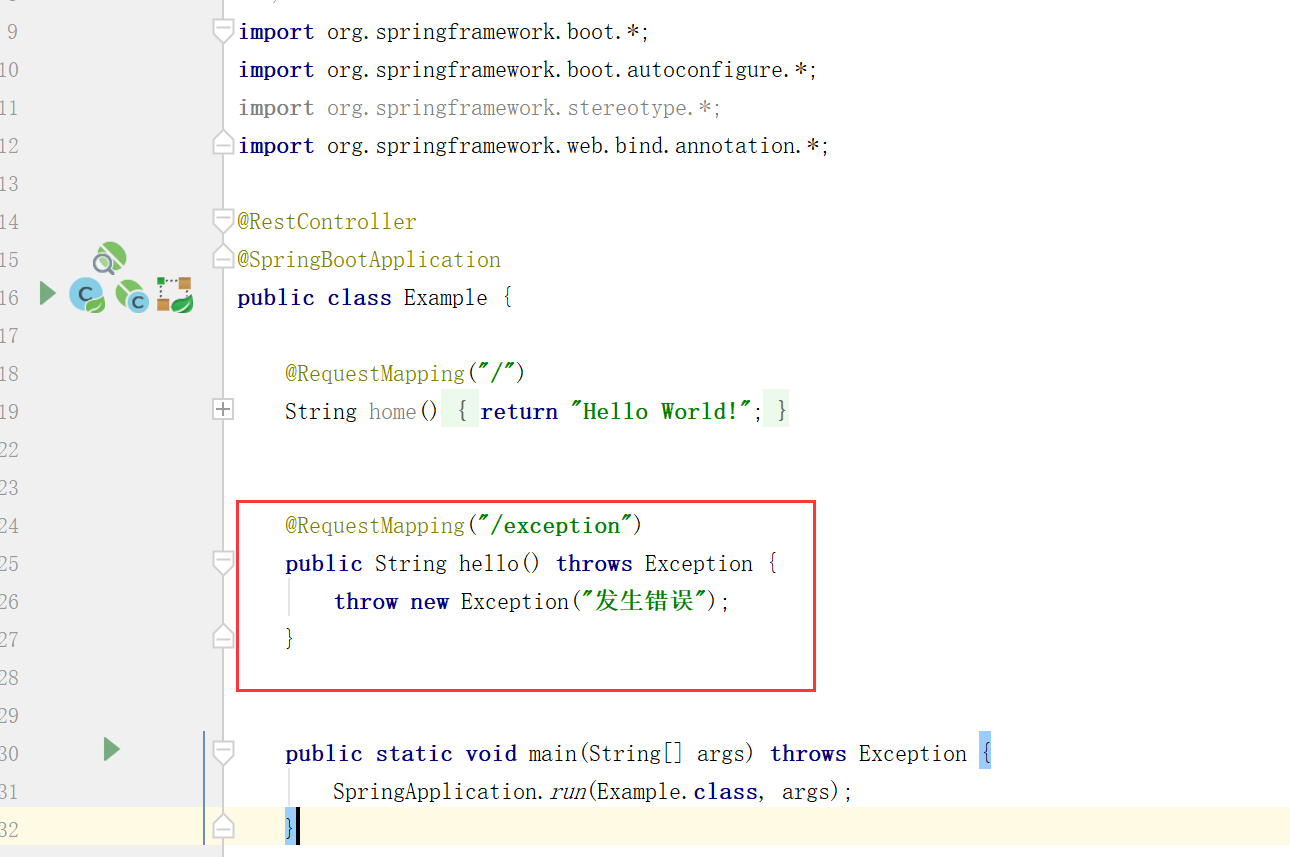
2.增加Controller方法,抛出异常
@RequestMapping("/exception")

public String hello() throws Exception {

throw new Exception("发生错误");

}
3.src/main/resources/templates增加error.html
<!DOCTYPE html>

<html xmlns:th="http://www.w3.org/1999/xhtml">

<head>

<meta charset="UTF-8" />

<title>统一异常处理</title>

</head>

<body>

<h1>Error</h1>

<div th:text="${msg}"></div>

</body>

</html>

(二)集成Mybatis
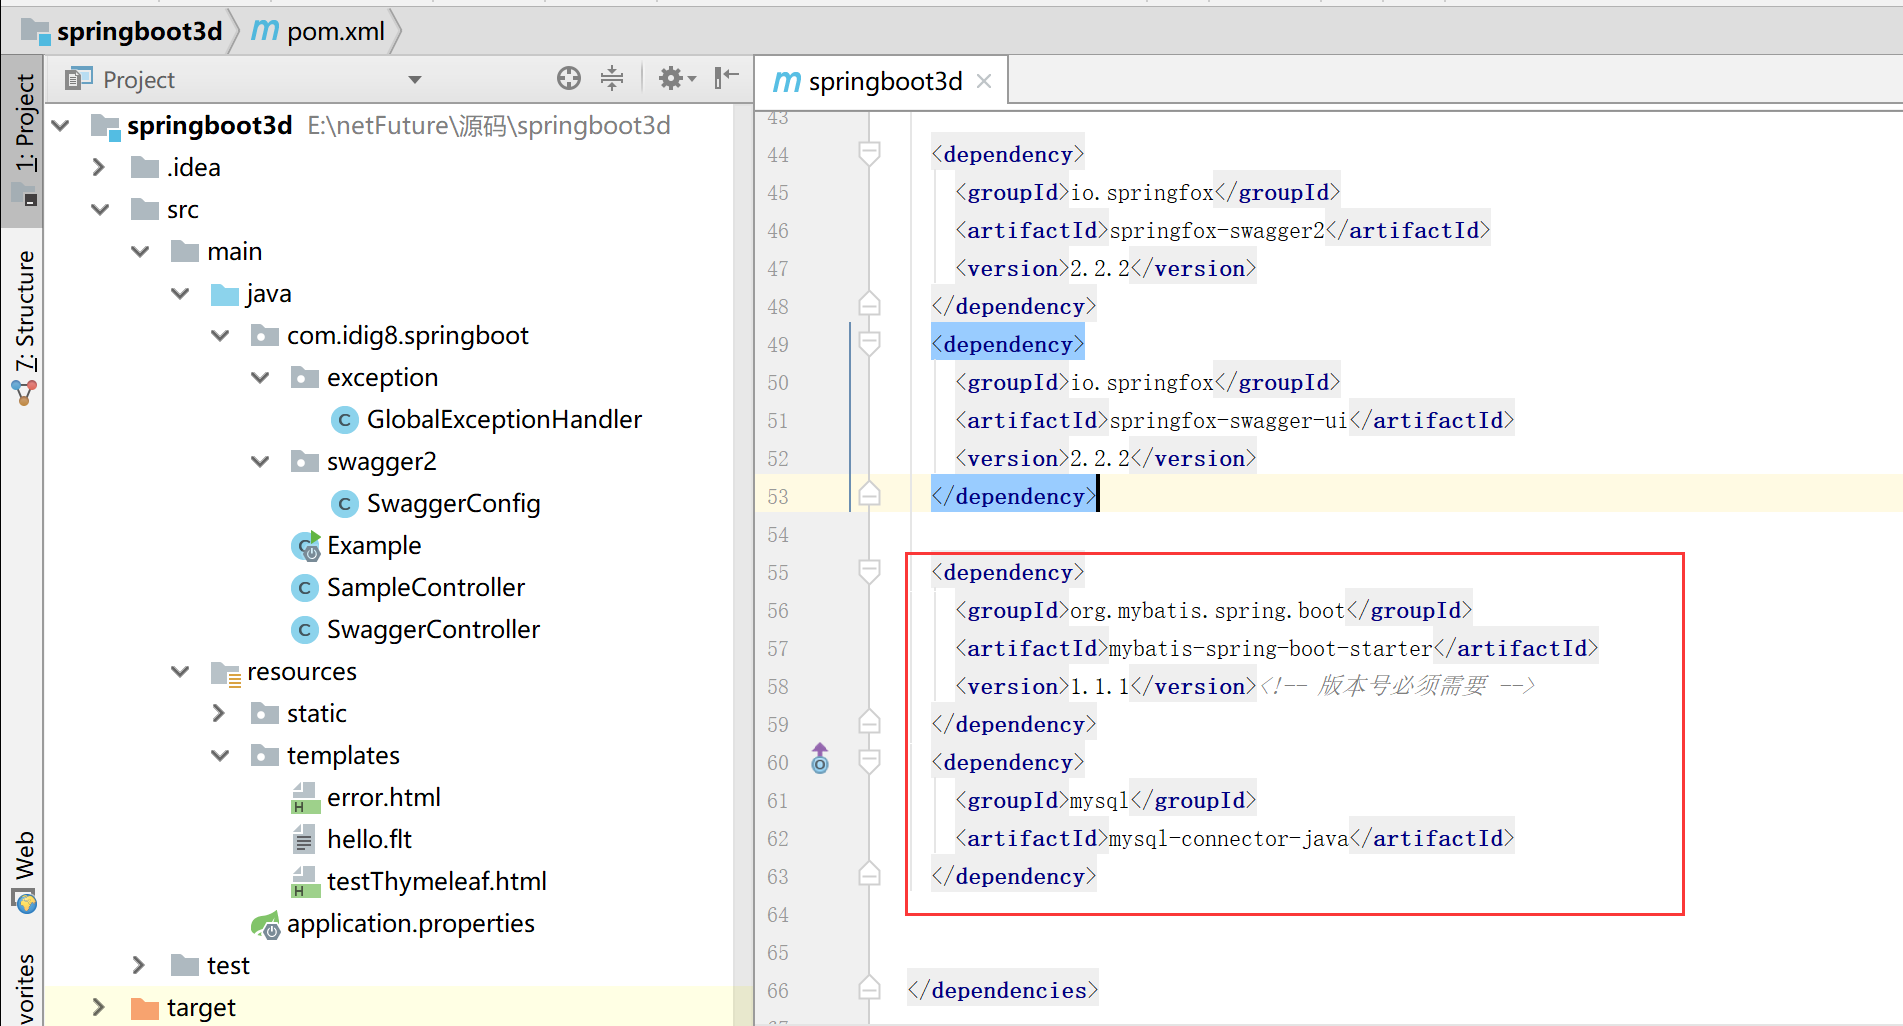
1.修改pom.xml,增加依赖
<dependency>

<groupId>org.mybatis.spring.boot</groupId>

<artifactId>mybatis-spring-boot-starter</artifactId>

<version>1.1.1</version><!-- 版本号必须需要 -->

</dependency>

<dependency>

<groupId>mysql</groupId>

<artifactId>mysql-connector-java</artifactId>

</dependency>
2.mysql的连接配置
application.properties:
spring.datasource.url=jdbc:mysql://localhost:3306/spring

spring.datasource.username=root

spring.datasource.password=root

spring.datasource.driver-class-name=com.mysql.jdbc.Driver

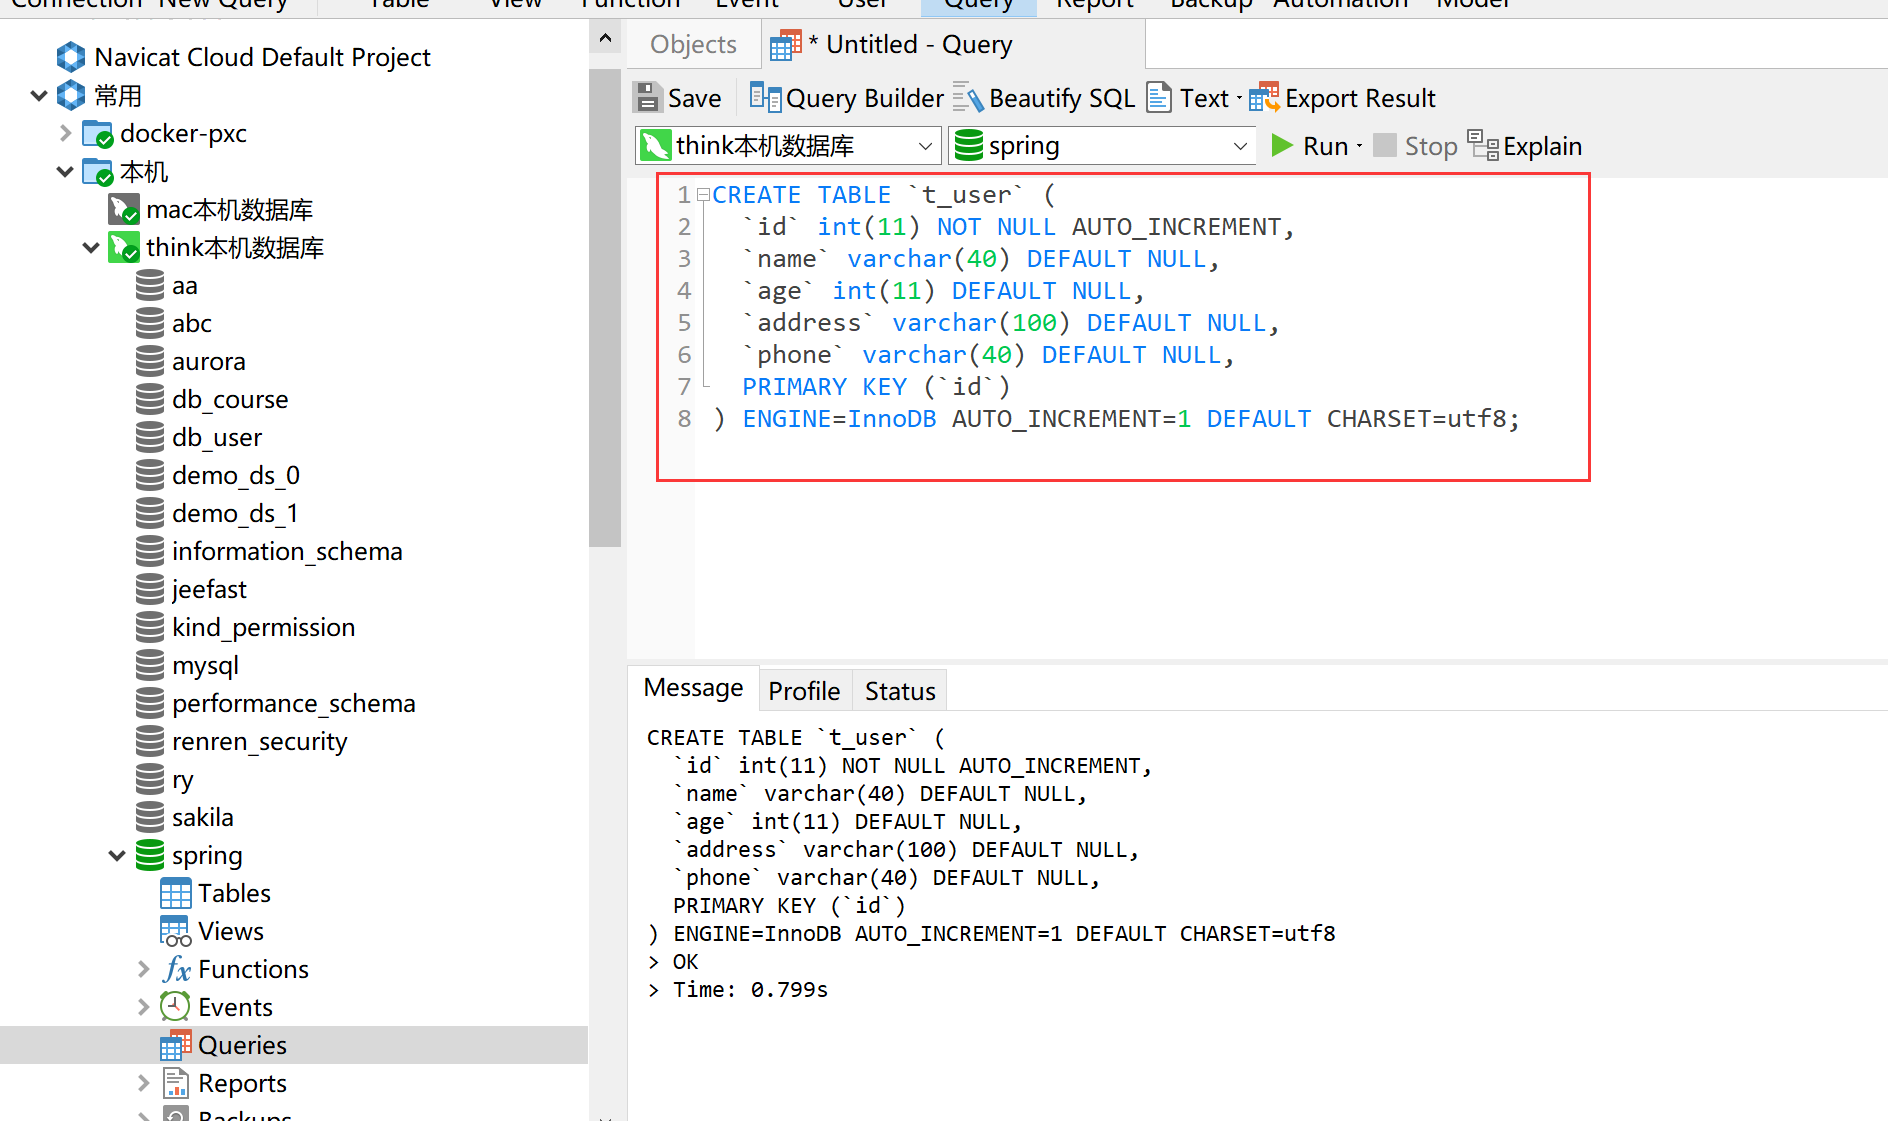
3.创建表t_user
CREATE TABLE `t_user` (

`id` int(11) NOT NULL AUTO_INCREMENT,

`name` varchar(40) DEFAULT NULL,

`age` int(11) DEFAULT NULL,

`address` varchar(100) DEFAULT NULL,

`phone` varchar(40) DEFAULT NULL,

PRIMARY KEY (`id`)

) ENGINE=InnoDB AUTO_INCREMENT=1 DEFAULT CHARSET=utf8;
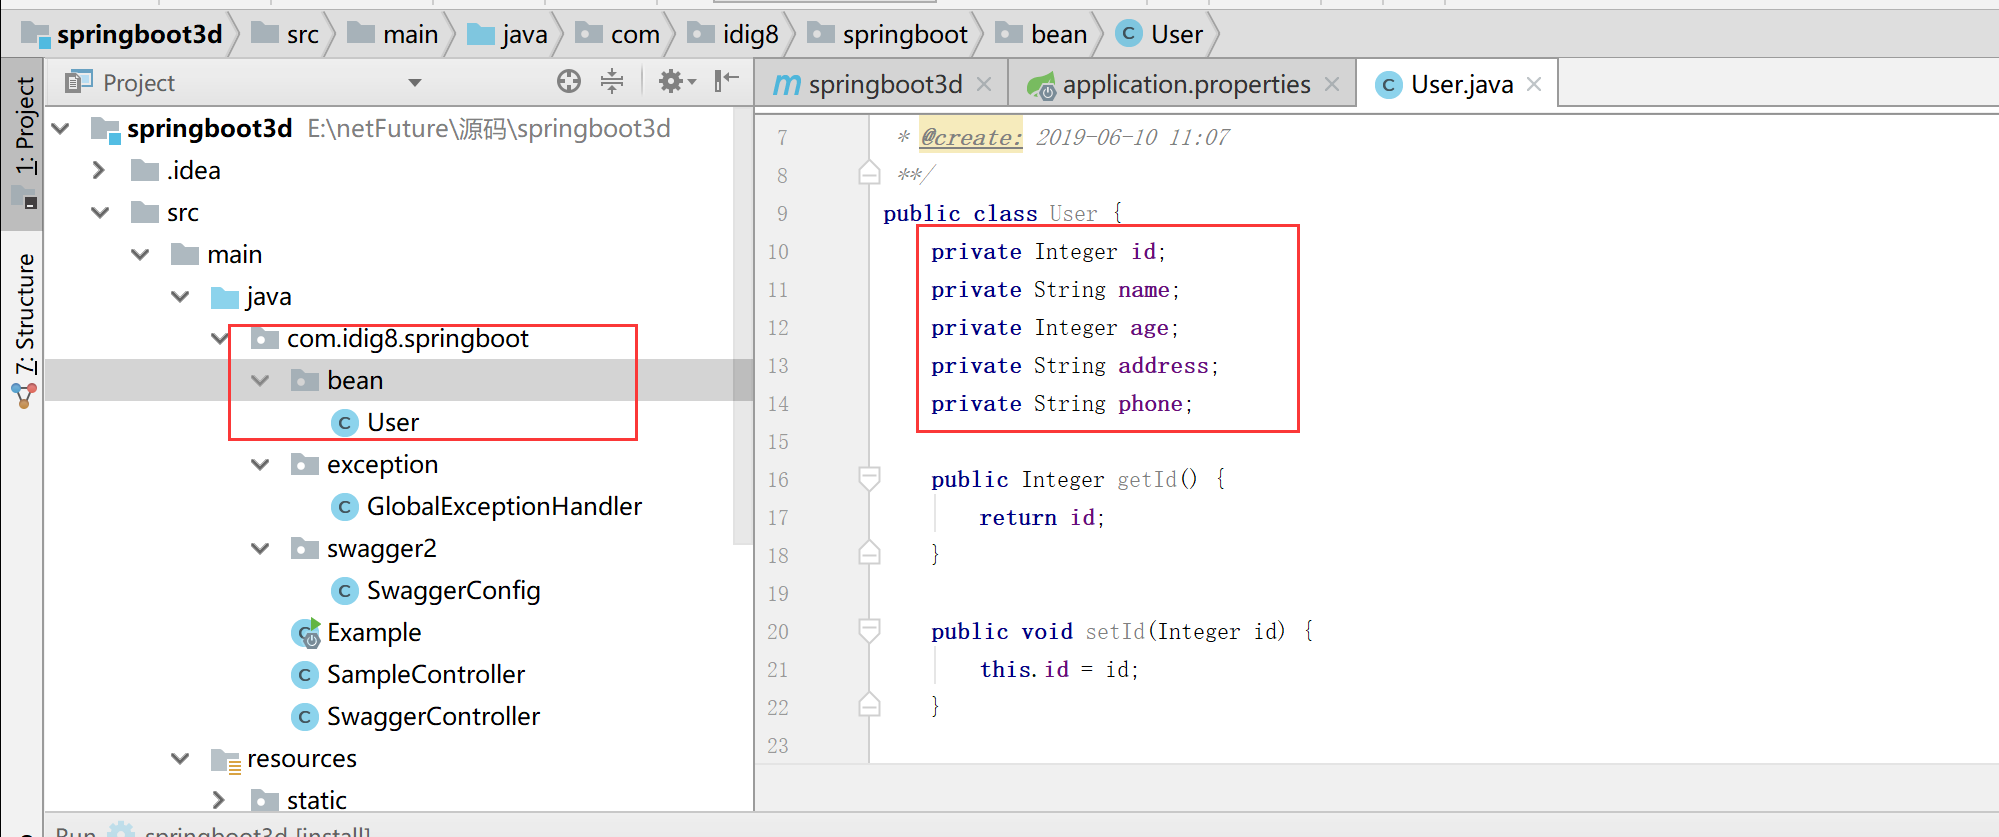
4.创建User.java文件
包名为:com.idig8.springboot.bean
package com.idig8.springboot.bean;


/**

* @program: springboot3d

* @description: ${description}

* @author: LiMing

* @create: 2019-06-10 11:07

**/

public class User {

private Integer id;

private String name;

private Integer age;

private String address;

private String phone;


public Integer getId() {

return id;

}


public void setId(Integer id) {

this.id = id;

}


public String getName() {

return name;

}


public void setName(String name) {

this.name = name;

}


public Integer getAge() {

return age;

}


public void setAge(Integer age) {

this.age = age;

}


public String getAddress() {

return address;

}


public void setAddress(String address) {

this.address = address;

}


public String getPhone() {

return phone;

}


public void setPhone(String phone) {

this.phone = phone;

}

}
5.创建UserMapper.java接口文件
包名为:com.idig8.springboot.mybatis
package com.idig8.springboot.mybatis;


import com.idig8.springboot.bean.User;

import org.apache.ibatis.annotations.Insert;

import org.apache.ibatis.annotations.Mapper;

import org.apache.ibatis.annotations.Param;

import org.apache.ibatis.annotations.Select;


/**

* @program: springboot3d

* @description: ${description}

* @author: LiMing

* @create: 2019-06-10 11:09

**/

@Mapper

public interface UserMapper {

/**根据id查询用户*/

@Select("SELECT * FROM T_USER WHERE ID = #{id}")

User findById(@Param("id") String id);

/**新增用户*/

@Insert("INSERT INTO T_USER(NAME, AGE, ADDRESS, PHONE) VALUES(#{name}, #{age}, #{address}, #{phone})")

int insert(@Param("name") String name, @Param("age") Integer age,@Param("address") String address,@Param("phone") String phone);

}

6.测试
@RunWith(SpringJUnit4ClassRunner.class)

@SpringBootTest(classes = Example.class)

public class MybatisTest {

@Autowired

private UserMapper userMapper;

@Test

public void testInsert() throws Exception {

int num = userMapper.insert("zhangsan222", 20,"长沙","13100000000");

TestCase.assertEquals(num,1);

}

@Test

public void testFindById() throws Exception {

User u = userMapper.findById("6");

TestCase.assertNotNull(u);

System.out.println(u.getName());

}
(三)集成Mybatis
1.修改pom.xml,增加依赖
<dependency>

<groupId>org.springframework.boot</groupId>

<artifactId>spring-boot-starter-data-redis</artifactId>

</dependency>
注意:旧版本spring boot中集成的redis starter为:spring-boot-starter-redis
2.redis连接配置
注意:spring.redis.database的配置通常使用0即可,Redis在配置的时候可以设置数据库数量,默认为16,可以理解为数据库的schema。
# REDIS (RedisProperties)

# Redis数据库索引(默认为0)

spring.redis.database=0

# Redis服务器地址

spring.redis.host=127.0.0.1

# Redis服务器连接端口

spring.redis.port=6379

# Redis服务器连接密码(默认为空)

spring.redis.password=

# 连接池最大连接数(使用负值表示没有限制)

spring.redis.pool.max-active=8

# 连接池最大阻塞等待时间(使用负值表示没有限制)

spring.redis.pool.max-wait=-1

# 连接池中的最大空闲连接

spring.redis.pool.max-idle=8

# 连接池中的最小空闲连接

spring.redis.pool.min-idle=0

# 连接超时时间(毫秒)

spring.redis.timeout=0
3.测试redis
注意:redis中存储对象,需要我们自己实现RedisSerializer接口来对传入对象进行序列化和反序列化
@RunWith(SpringJUnit4ClassRunner.class)

@SpringBootTest(classes = SpringBootMain.class)

public class SpringRedisTest {

@Autowired

private RedisTemplate<String,String> redisTemplate;

@Test

public void testRedis() throws Exception {

ValueOperations<String, String> ops = redisTemplate.opsForValue();

ops.set("name", "zhangsan");

String value = ops.get("name");

System.out.println(value);

TestCase.assertEquals("zhangsan", value);

}

}
(四)集成RabbitMQ
RabbitMQ是以AMQP协议实现的一种消息中间件产品,
AMQP是Advanced Message Queuing Protocol的简称,它是一个面向消息中间件的开放式标准应用层协议。
AMQP中定义了以下标准特性:
1.消息方向
2.消息队列
3.消息路由(包括:点到点模式和发布-订阅模式)
4.可靠性
5.安全性
关于AMQP 、RabbitMQ的详细内容不再这里过多介绍,本次课主要讲怎么与Spring boot集成。
- 安装RabbitMQ
官网:https://www.rabbitmq.com/download.html
windows安装不再说了,都是傻瓜试的。linux可能比较麻烦自行百度吧。

打开浏览器并访问:http://localhost:15672/,并使用默认用户guest登录,密码也为guest,即可进入管理界面
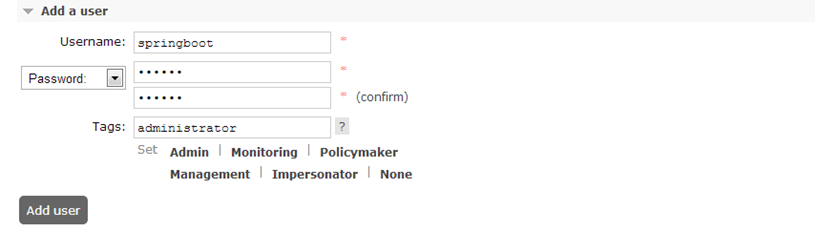
新增管理用户并设置权限
username:springboot
password:123456
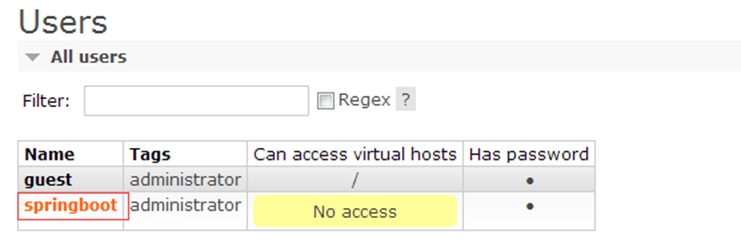
切换到springboot用户登陆,在All users中,点击Name为springboot, 进入权限设置页面
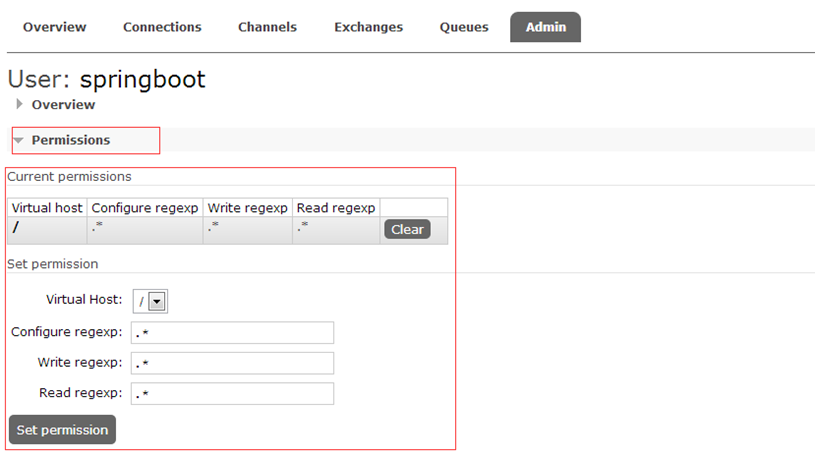
在权限设置页面,进入Permissions页面,点击“Set permission"
- Spring Boot整合修改pom.xml,增加依赖支持
<dependency>

<groupId>org.springframework.boot</groupId>

<artifactId>spring-boot-starter-amqp</artifactId>

</dependency>
- rabbit mq连接配置
spring.rabbitmq.host=localhost

spring.rabbitmq.port=5672

spring.rabbitmq.username=springboot

spring.rabbitmq.password=123456
- 创建Rabbit配置类
配置类主要用来配置队列、交换器、路由等高级信息
import org.springframework.amqp.core.Queue;

import org.springframework.context.annotation.Bean;

import org.springframework.context.annotation.Configuration;

@Configuration

public class RabbitConfig {

@Bean

public Queue firstQueue() {

// 创建一个队列,名称为:first

return new Queue("first");

}

}
- 创建消息产生者类
说明:通过注入AmqpTemplate接口的实例来实现消息的发送,AmqpTemplate接口定义了一套针对AMQP协议的基础操作。
@Component

public class Sender {

@Autowired

private AmqpTemplate rabbitTemplate;

public void send() {

rabbitTemplate.convertAndSend("first", "test rabbitmq message !!!");

}

}
- 创建消息消费者
说明:
@RabbitListener注解:定义该类需要监听的队列
@RabbitHandler注解:指定对消息的处理
@Component

@RabbitListener(queues = "first")

public class Receiver {

@RabbitHandler

public void process(String msg) {

System.out.println("receive msg : " + msg);

}

}
- 创建测试类
@RunWith(SpringJUnit4ClassRunner.class)

@SpringBootTest(classes = SpringBootMain.class)

public class RabbitmqTest {

@Autowired

private Sender sender;

@Test

public void testRabbitmq() throws Exception {

sender.send();

}

}
- 启动主程序:SpringBootMain
控制台如果出现以下信息,则说明rabbitmq连接成功
Created new connection: rabbitConnectionFactory#29102d45:0/SimpleConnection@1dcfb5ba [delegate=amqp://springboot@127.0.0.1:5672/, localPort= 55088]
- 运行Junit测试类
控制台输出:

receive msg : test rabbitmq message !!!


集成Rabbit MQ完毕!
PS:mq和redis之前在别的专题都说过多次了,这里就不详细的截图了。下次咱们一起说说 日志方面。
-
Springboot应用的多环境打包入门11-23
-
Springboot应用的生产发布入门教程11-23
-
Python编程入门指南11-23
-
Java创业入门:从零开始的编程之旅11-23
-
Java创业入门:新手必读的Java编程与创业指南11-23
-
Java对接阿里云智能语音服务入门详解11-23
-
Java对接阿里云智能语音服务入门教程11-23
-
JAVA对接阿里云智能语音服务入门教程11-23
-
Java副业入门:初学者的简单教程11-23
-
JAVA副业入门:初学者的实战指南11-23
-
JAVA项目部署入门:新手必读指南11-23
-
Java项目部署入门:新手必看指南11-23
-
Java项目部署入门:新手必读指南11-23
-
Java项目开发入门:新手必读指南11-23
-
JAVA项目开发入门:从零开始的实用教程11-23
