小程序开发
小程序自定义标题栏写法(适配各种大小刘海屏)
思路
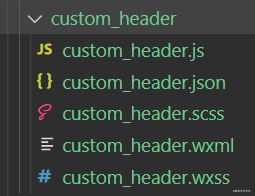
1.先创建一个自定义组件文件
2.把基本wxml及wxss文件写好
3.把返回的箭头点击区域弄大点方便点击
4.把标题部分固定宽度,如果超出宽度省略号显示
5.在js里面调用微信提供的api
wx.getMenuButtonBoundingClientRect()获取胶囊大小及位置6.上一步,得到的位置动态去设置样式,使用
style设置样式7.如果你有页面原生组件建议使用
cover-view,但是使用这个标签没有伪类,所有不能使用伪类写箭头样式8.我这里使用胶囊底部
button为整体高度,所有需要加上6px这样会更美观点,不然会贴边效果图如下及代码部分请继续阅读:
<view class="custom_header" style="height:{{barHeight + 6}}px;">
<view class="arrow" style="height:{{titleHeight}}px;top:{{top}}px;"></view>
<view class="custom_header_title" style="height:{{titleHeight}}px;line-height:{{titleHeight}}px;top:{{top}}px;">访客详情</view>
</view>
data: {
barHeight: 56,
titleHeight: 32,
top: 24
},
methods: {
init() {
// 右边胶囊大小高度
let getMenuButton = wx.getMenuButtonBoundingClientRect();
console.log(getMenuButton, 'getMenuButton')
this.setData({ barHeight: getMenuButton.bottom,
titleHeight: getMenuButton.height,
top: getMenuButton.top });
}
},
lifetimes: {
// 生命周期函数,可以为函数,或一个在methods段中定义的方法名
attached: function () {this.init();},
moved: function () { },
detached: function () { },
},
.custom_header {
position: fixed;
width: 100%;
top: 0;
left: 0;
background-color: #ccc;
z-index: 10000; }
.custom_header .arrow {
position: absolute;
width: 80rpx;
height: 64rpx;
margin-left: 0; }
.custom_header .arrow::before {
content: "";
position: absolute;
left: 25rpx;
top: 50%;
width: 22rpx;
height: 22rpx;
border-top: 1px solid #ffffff;
border-right: 1px solid #ffffff;
-webkit-transform: translate(0, -50%) rotate(-135deg);
-moz-transform: translate(0, -50%) rotate(-135deg);
transform: translate(0, -50%) rotate(-135deg); }
.custom_header .custom_header_title {
position: absolute;
left: 0;
right: 0;
margin: auto;
width: 420rpx;
font-size: 34rpx;
color: #FFFFFF;
text-align: center;
font-weight: bold;
text-overflow: ellipsis;
white-space: nowrap;
overflow: hidden; }
作者:哈罗哈皮


